 Home |
Creating a New Board |
 Crafts |
||
|
One of the really cool things about HeroQuest is that the generic map can be reconfigured to make all sorts of different maps during play. The inclusion of a few "dead ends" and "doors" suddenly create a totally unknown map for the players. My pet peeve with the map was that it's a little bit too small. Besides starting to come apart at the seams a little bit, it was frustrating to have a group of heroes and monsters and doors and objects all in close proximity to each other. There's not quite enough room, especially when the door is placed between squares. Therefore I resolved to solve this problem and create a new, larger map. The easy method would be to scan in the existing map and scale it up a bit and use that. If you're doing it for yourself this is a great idea, since you are the legal owner of the game (and board)..however for this article I decided to create a new map, of a larger size but based on the original. This technique could be used for specialized maps as well. First I'll discuss how I created the graphics, then how it gets on paper, then mounted as a usable map.
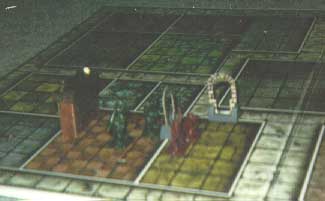
Creation of the graphics Just guessing from the existing map, and with a little work with a ruler, I decided I wanted to make the map about 25% larger than it was. This makes the squares a bit larger than the characters and gave lots of room for those cluttered fight scenes. It's a bit fuzzy, but as you can see from the picture below, the new map allows everyone fighting room.
Picture 1 - Figures on the new map
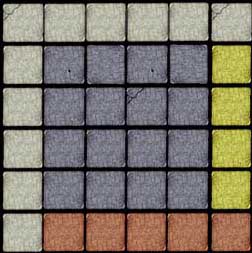
Now that I had the size worked out, I had to actually create the graphics -- starting up a 30x22 inch picture, I started to work. Actually that's not quite true. I measured out the existing map squares, created them and scaled them up 25%. I then replicated them across and down the required number of rows and columns. Coloring in the areas with approximately the color of the originals gave me a bunch of similar squares in garish colors. Notice how all the squares have roughly the same pattern, that's because I just created a couple and duplicated them.
Picture 2 - The map after coloring (half size)
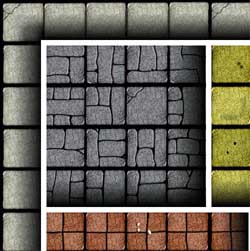
After the easy stuff was over it was time to knuckle down and do the graphics.. in order to try and do it reasonably similar to the original, each square had to be hand-modified. This turned out to be quite a bit more work than I originally thought, as the original artist had created virtually a different look for each room. Using the original art for reference, working with a dark shade of the basic room color, I drew in each crack and line. Then, using a light color, I added the highlights just to the side of the lines, to give them a 3D look. Finally the shading was added, this was pretty easy, using a dark-to-light mask and layer-multiply function in Photoshop. Then the white walls were laid down on top and while the result is not in the same league as the original it is still a serviceable map.
Picture 3 - same area after cracks, shading and walls
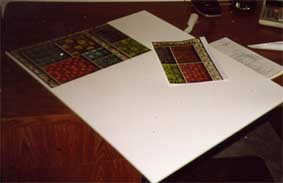
Getting It On Paper Once I had the full size map created, I needed some way to get it on a map-board. My concept was to get some of that stick-on label paper that goes through a printer. I figured I could find some that were in full sheets rather than little 2 inch square mailing labels. I did find full sheets of laser printer labels, and it was only $40 for a box of 100 sheets. Well, I figured I only needed 9 and wasn't ready to pay that kind of money so I continued looking. Fortunately I was able to find a brightly colored package called "Avery For Kids" which has 10 sheets of full-page stick-on paper in it for just a couple of bucks. Next I needed an actual base. At first I thought of getting a big piece of cardboard. That would work and has the advantage that it could be folded when complete. But I have a place in the closet and I wanted something a bit more permanent. At the stationery store I found a sheet of foam-core presentation board, the kind that kids use for their science projects. It cost me $5 for a sheet big enough for the map. Normally it costs $6, but it was kind of marked up, useless for a kid to use for presentations but fine for me since I was going to stick a map on it anyway. Then it was a matter of printing the map in pieces using my color printer and sticking the pieces to the board. A shot of the process is shown below:
Picture 4 - Assembling the map.
When it was complete I had a new HeroQuest map that was larger and mounted on a solid strong base. No more taping the joint to keep the paper from cracking. Of course it's a bit inconvenient to store, but I've got a corner of the closet where I keep it, and haul it out for those marathon sessions. Wrap Up Well, there it is, the full-sized ready-to-print map is attached. If you want to enhance it, please do so and share it with everyone. The concept of using the label paper for the graphics is a powerful one. In a future article I plan to use the technique to enhance the doorways in the game. But the possibilities are exciting... imagine you are creating a custom scenario and design the map with a special room, now you can draw out the room and provide it as a full-size template. The readers can print it and stick it onto a thin piece of cardboard and use it as an overlay on the map... just remember to provide 2 versions, a regular sized one and one that is 25% larger, so I can use it on my nice new map! Download the finished map here [thanks to Malechi for providing this lost file].
|
|
If you'd like, view our guestbook. Original materials on this site are copyright © 1998, 1999, 2000 by their respective creators. |